

How To Make Your Manga Drawings Look 3d
How to draw manga in Clip Studio Pigment
Learning how to draw manga isn't an easy matter to do, especially when you're staring at a blank canvas and the possibilities seem endless. Artists always feel excited about creating a new illustration, but with this joy comes many fears and a lot of self-dubiousness. Apart from being unsure where to start, y'all tin can ask yourself questions. Does your illustration look skillful? What else can you lot add together? Did you add together too much? What if yous change this? (Our roundup of how to draw tutorials is too certain to help.)
To help yous out, artist Asia Ladowska has shared her artistic process along with tips for how to draw manga. For this workshop, Ladowska created a character: Mai. This simple proper noun comes from the name of the month she painted her in. Ladowska started this illustration in May 2022 and didn't open the file until May 2022, once she'd finally finished it. Follow Ladowska's process below and observe how to draw manga.
Want even more? See our tips on how to describe manga characters. And for new tools (including Prune Studio Paint), here's our choice of the all-time digital art software around.
How to draw manga
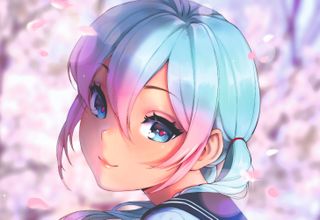
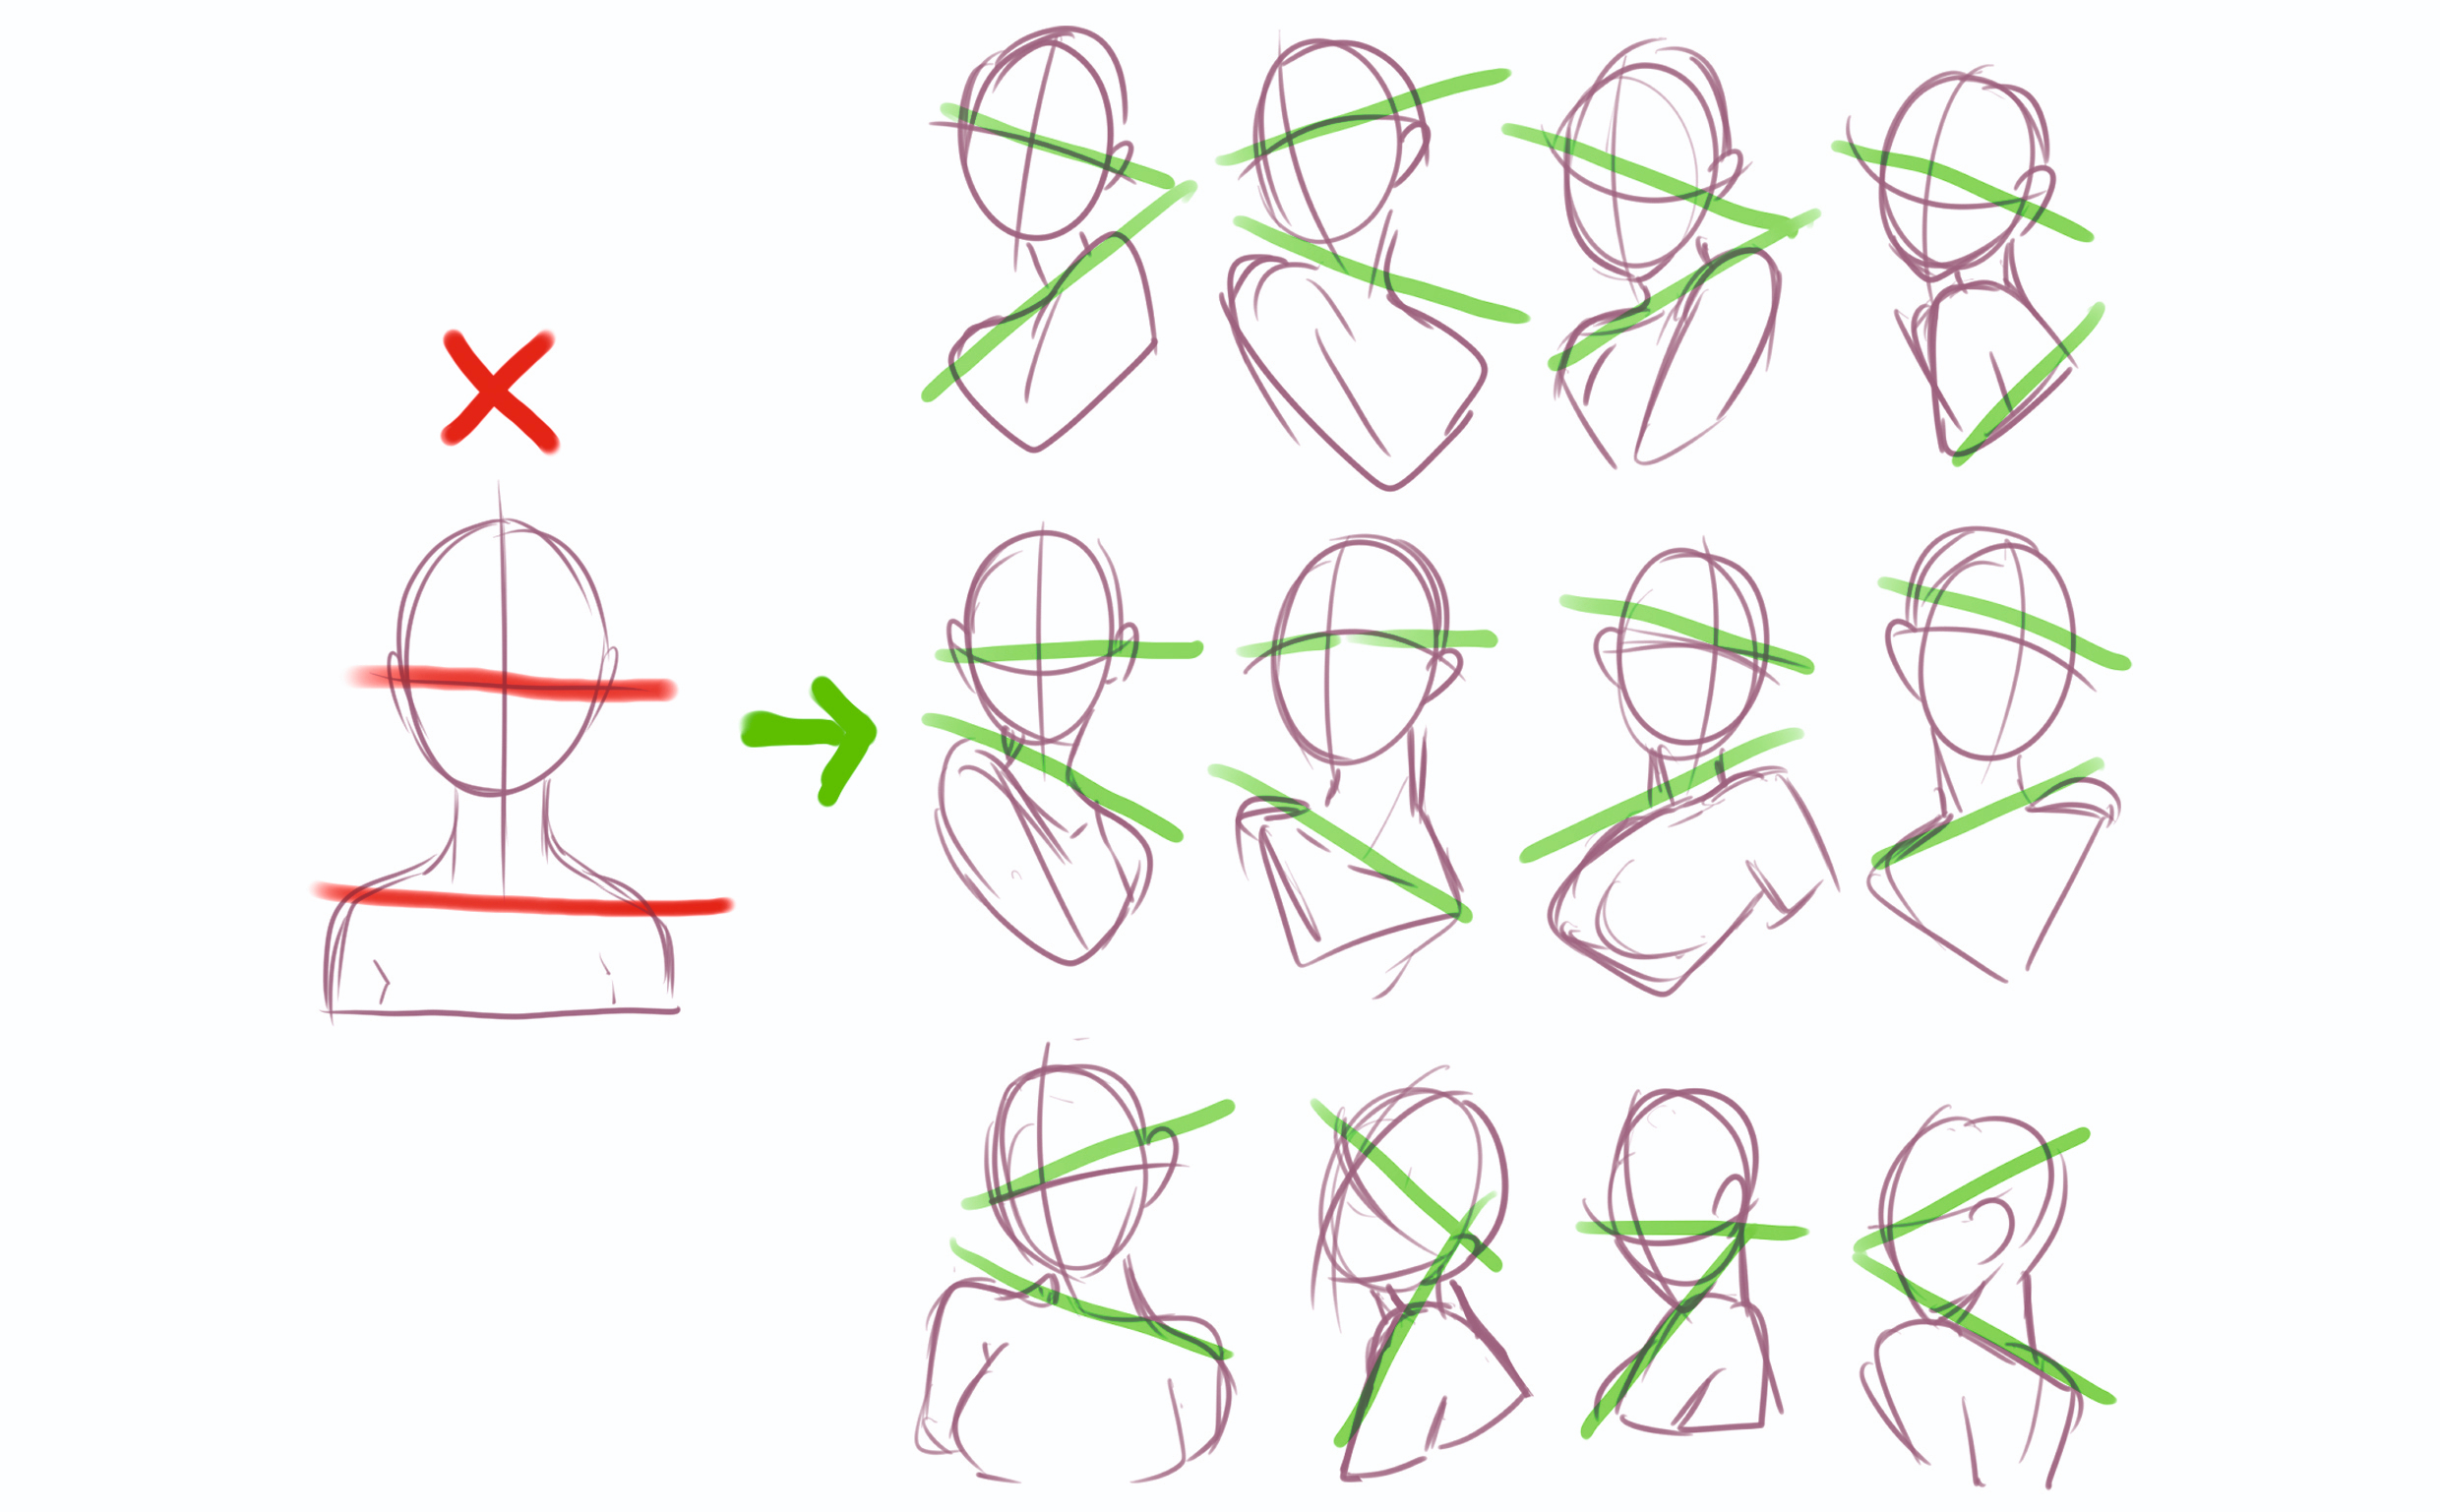
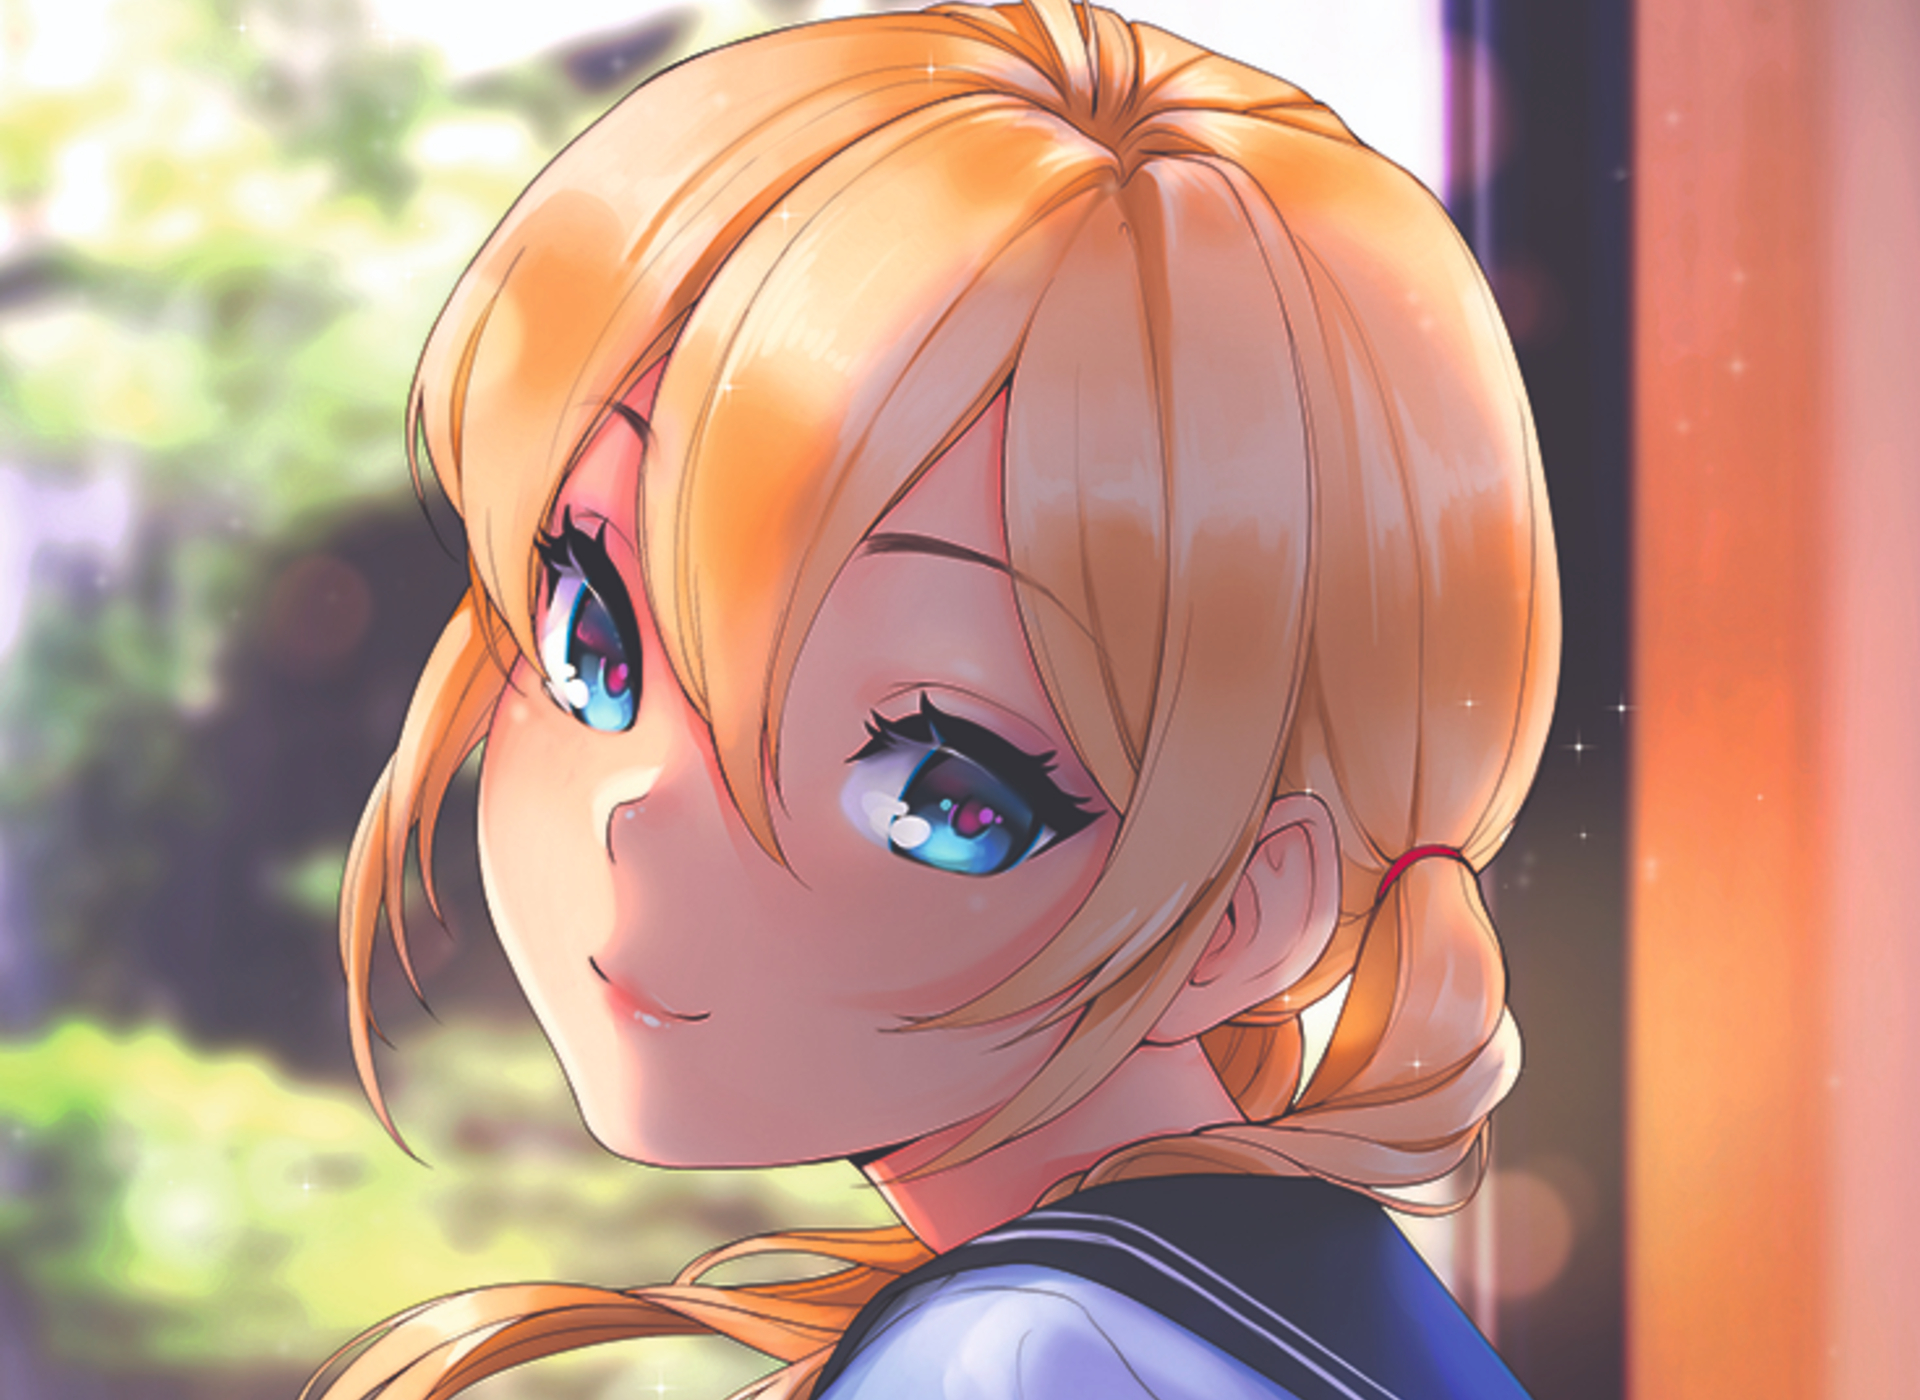
01. Choose an interesting angle
(Image: © Asia Ladowska)
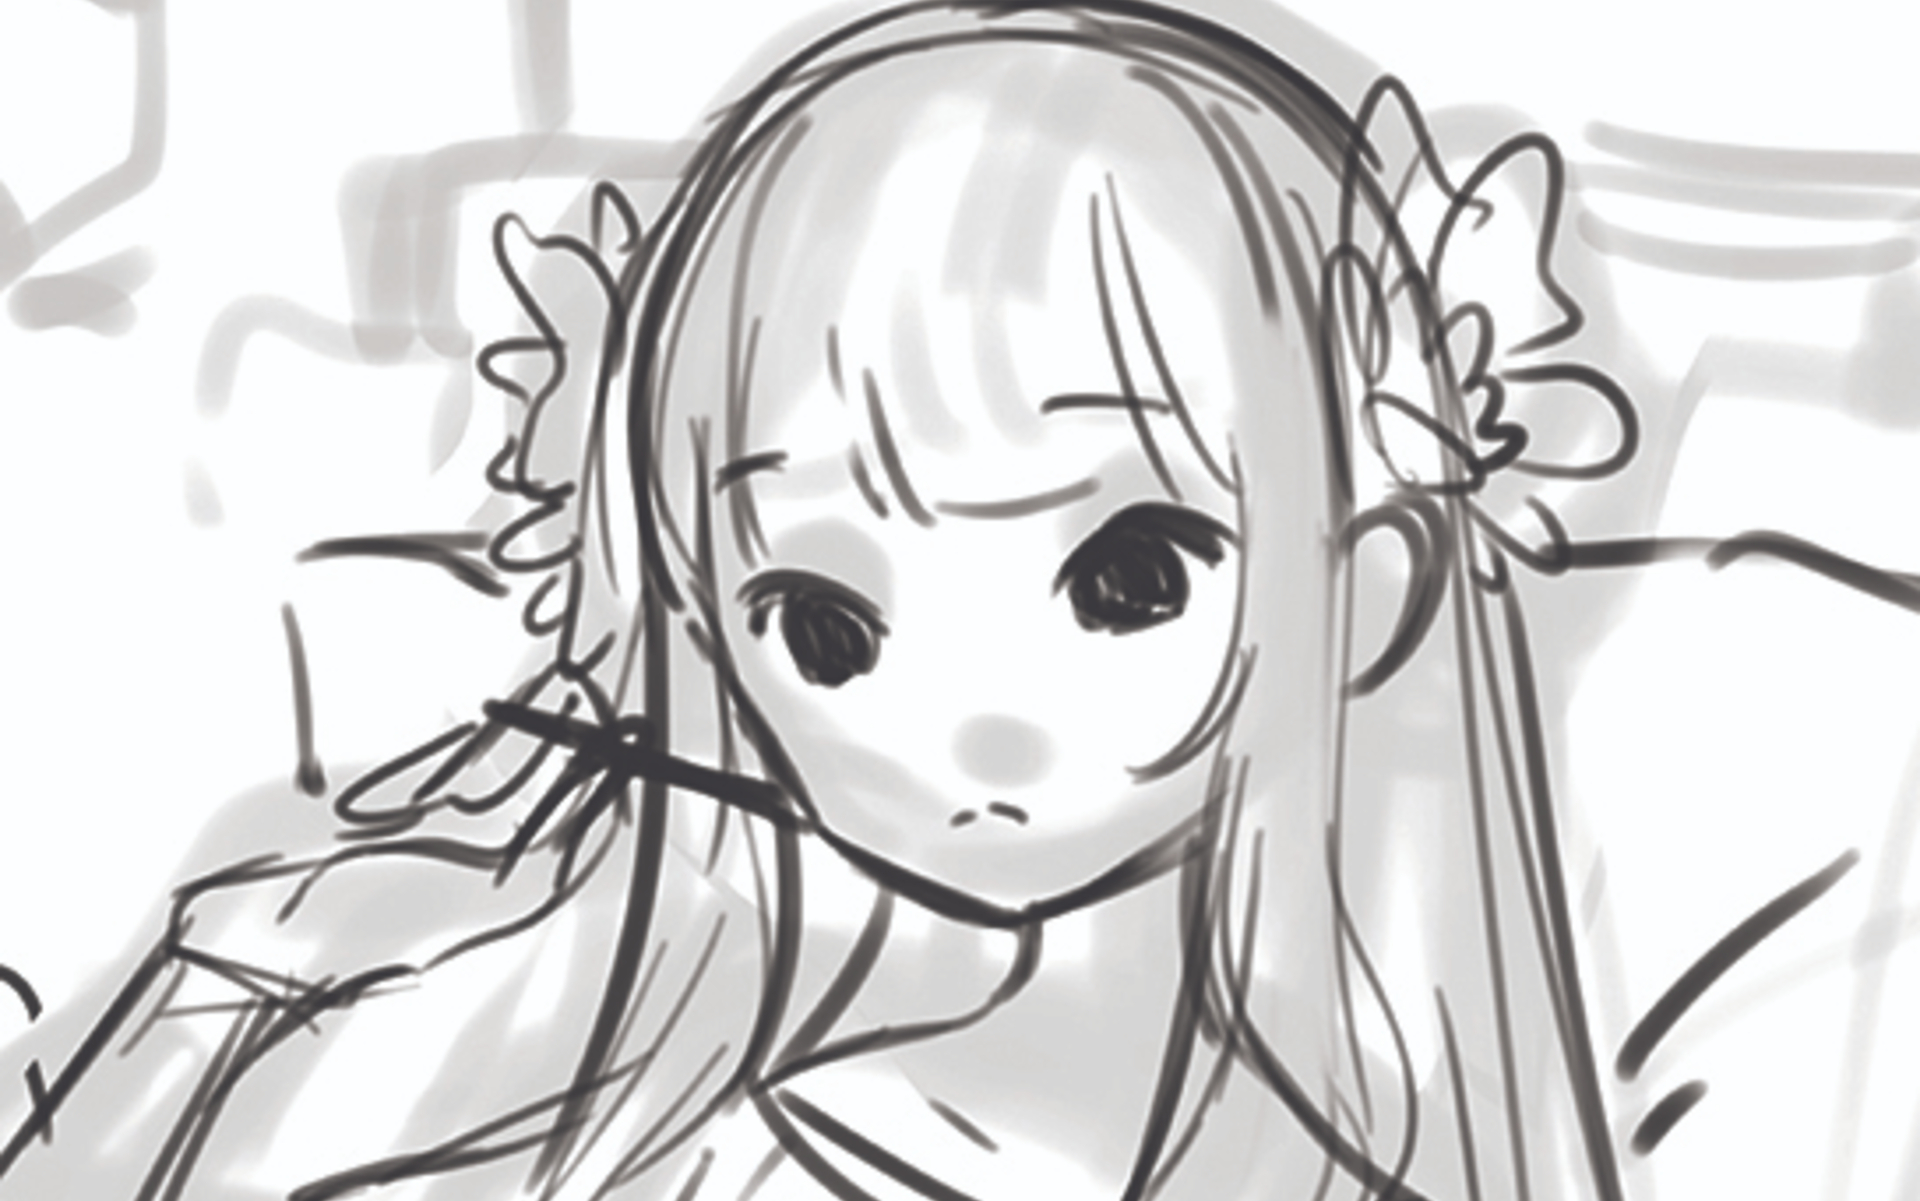
The almost difficult bending to work with when cartoon a portrait is the frontal view. It needs careful symmetry, balance and well-measured proportions, and when you put all of this together information technology looks a fiddling… boring. I e'er struggle to make frontal poses look interesting, and end upward trying to second-guess myself. Even if I push through the process, the result doesn't await very bonny. Nonetheless, if you choose a slightly more than dynamic angle then yous'll be off to a proficient start!
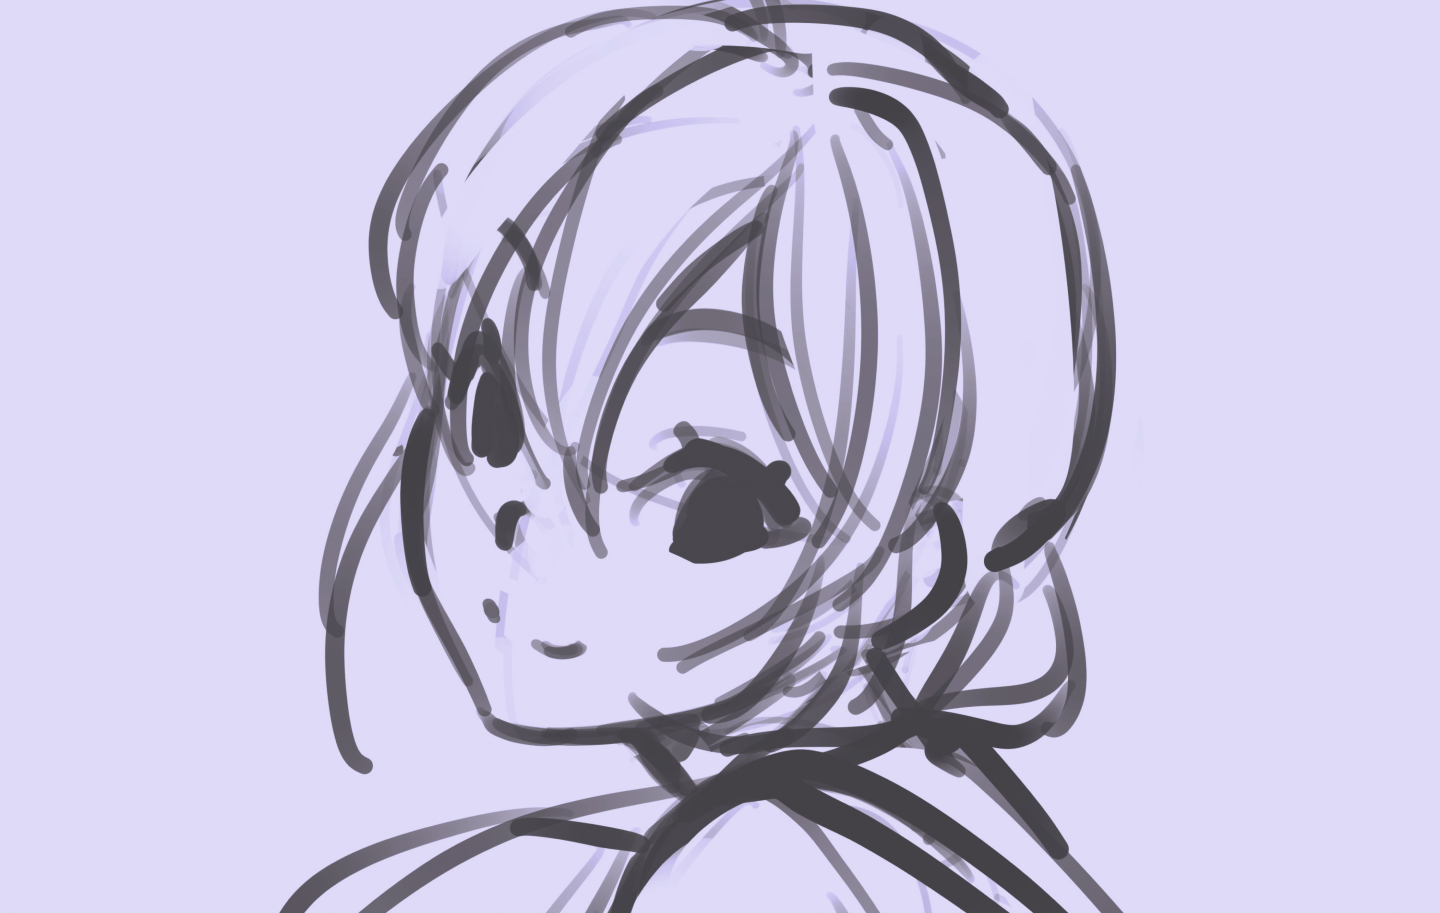
02. Sketch quickly
(Image: © Asia Ladowska)
I always try to draft a sketch in nether 15 minutes. Permit's face up it – it's just a sketch. I demand to visualise my idea before I forget information technology! My favourite tool to utilize in Clip Studio Paint is the Darker Pencil. It's good for sketches, line-fine art and even shading. I mainly use the software'due south default brushes, but adjust their settings slightly. For the Darker Pencil I always untick the Adapt past Speed option and change Stabilization to around 15.
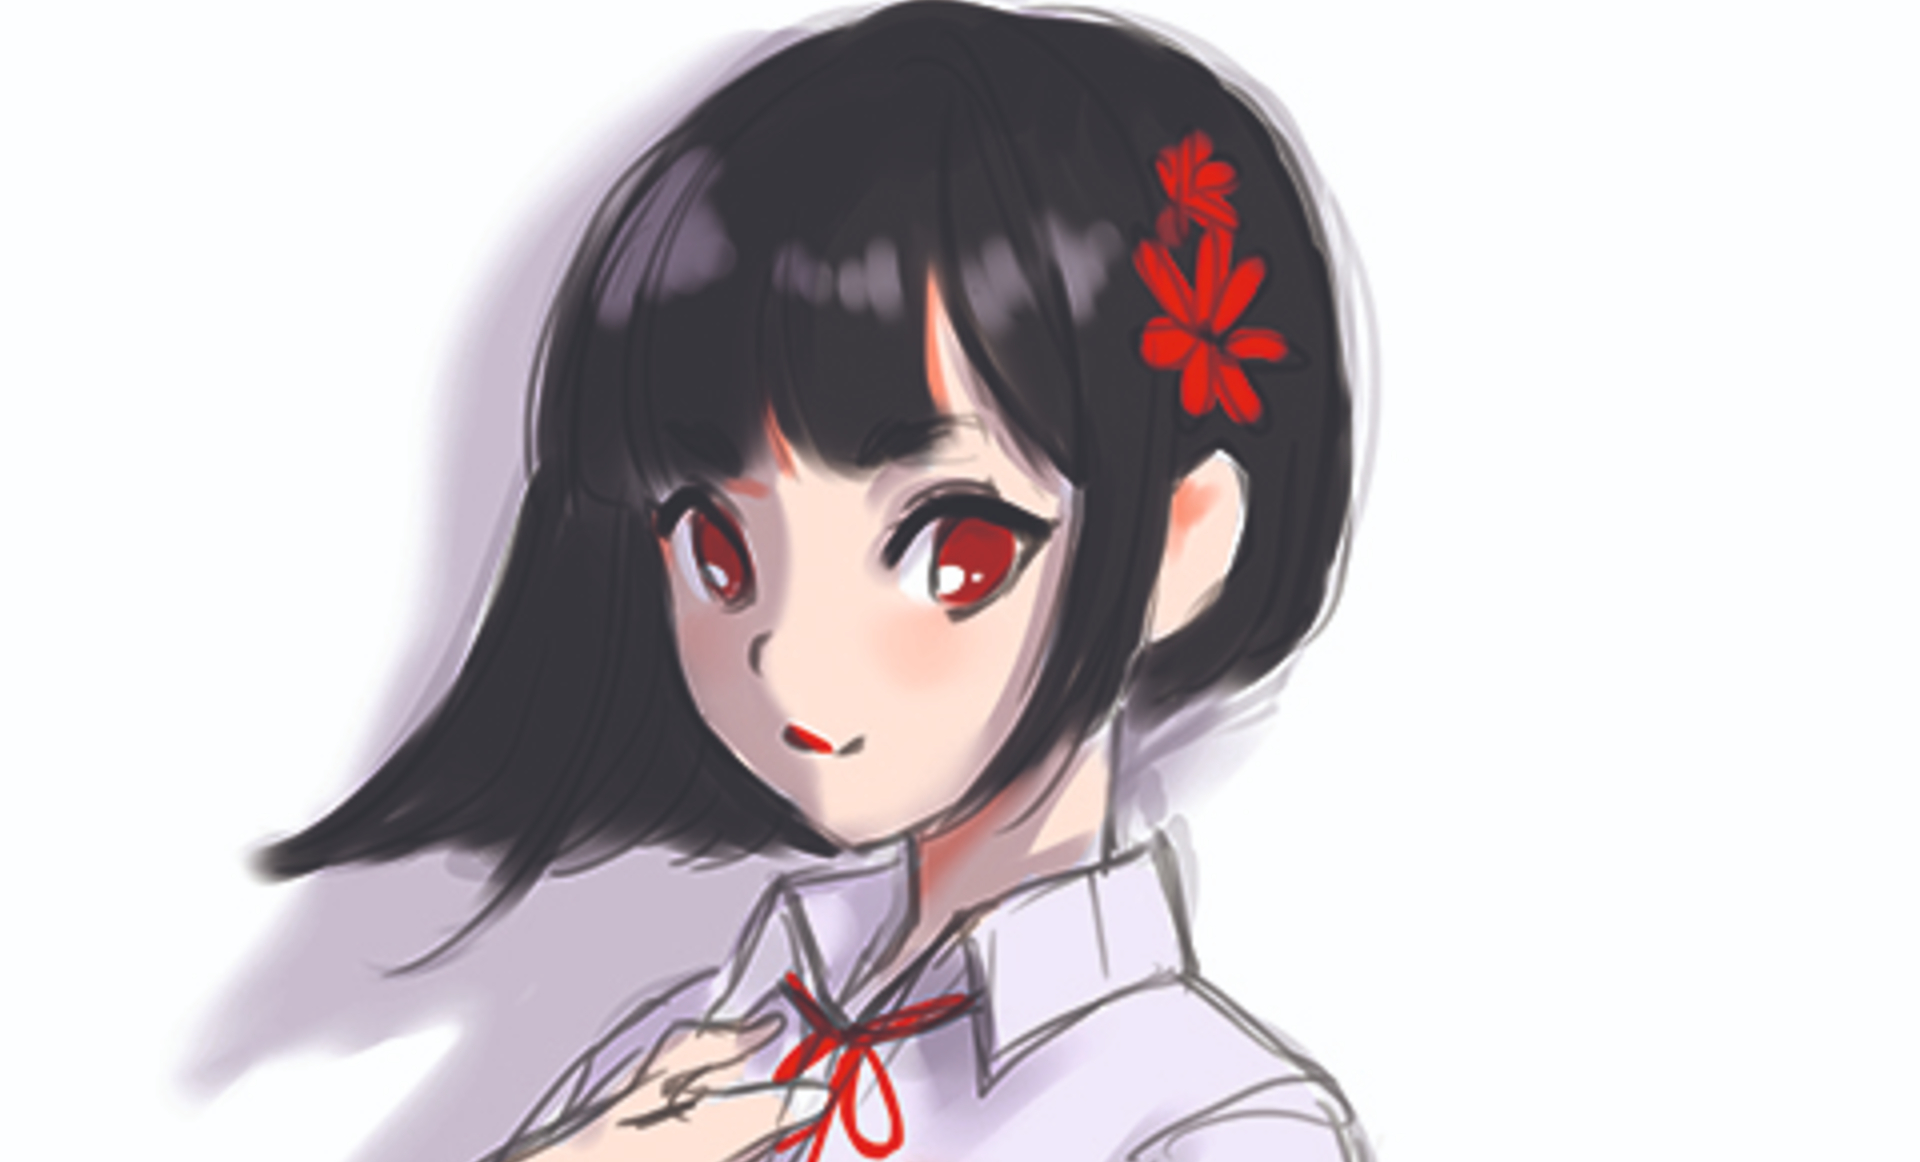
03. Colour your sketches
(Image: © Asia Ladowska)
I normally add a splash of colour to my sketches at this stage to bring out the character. Some mistakes tin't be spotted when there are but lines in place (and on top of that, many messy lines!). It helps to see the analogy as a shape, and colours assist to shape sketches. When you lot squint you lot can already run into the character. For the lines of this sketch I used a dark navy colour rather than blackness, and when I inverse the layer mode to Color Burn it resulted in beautiful hues that I can use later for shading my grapheme.
04. Don't rush the line-art
(Image: © Asia Ladowska)
I tin can break downwardly my process into sketch, line-fine art, colours and post-processing. Notwithstanding each of these steps tin can go complicated. By proverb "don't blitz the line-art" I don't hateful draw slowly, only rather refine the sketch as many times as information technology takes for the line-art to go easier to draw.
05. Salve time using Clip Studio Paint's Smart Bucket tool
(Image: © Asia Ladowska)
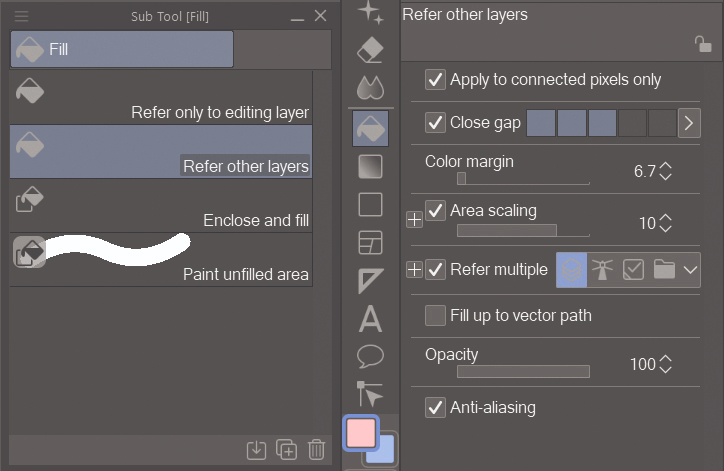
Before I knew Clip Studio Pigment, I used to waste product endless hours drawing flat layers manually. Luckily, you don't have to make that mistake! The software's Smart Bucket tool is very good at recognising line-art and with one click I tin can fill in almost of the areas. If you play with its settings it can identify lines that have gaps in them, or even textured lines. To make sure all the pixels in my character are selected, I colour the background first on a divide layer. And so I switch off the line-art and color the reverse on some other layer.
06. Use a difficult brush rather than a soft airbrush
(Prototype: © Asia Ladowska)
Good drawings take both soft and difficult shadows in identify, just if you're not sure what and where they should go, cull the hard edge. Drawings look much better with flat prison cell shading (but await at all the anime ever made!) rather than mellow soft airbrush shading for everything. I ever use a difficult brush first then alloy selected edges into soft ones if necessary.
In this stride I've added some shading to all of the colour layers. Much like artists who employ ambient apoplexy, this shading doesn't define any light source. Rather, it adds some depth to the character and makes her look more interesting. Let me show yous how I do it in the adjacent step.
07. Utilise the Transparent Watercolor brush every bit a blender
(Paradigm: © Asia Ladowska)
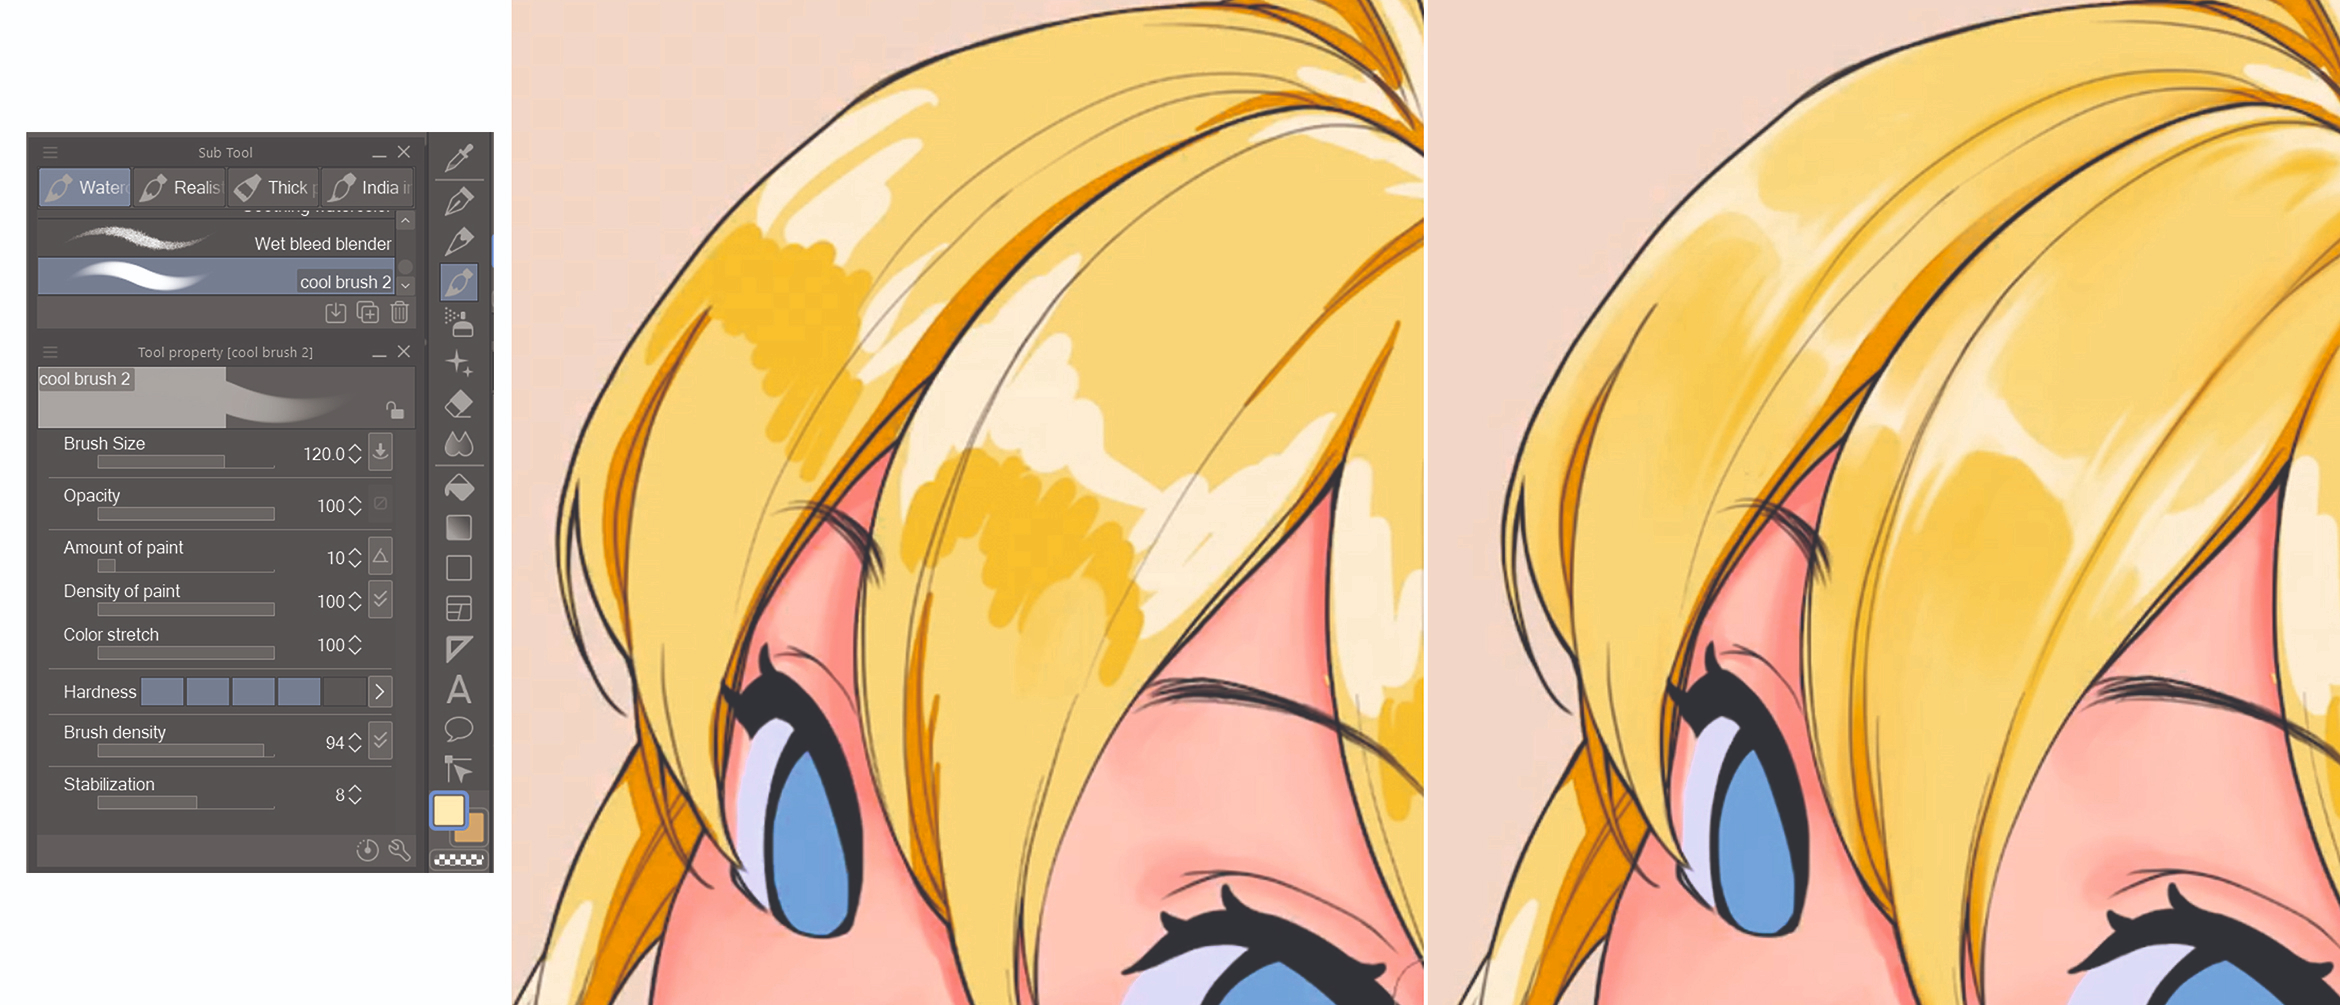
For me, a much more powerful tool than the Blending brush or any other paint castor is the Transparent Watercolor default brush in Clip Studio Paint. You tin can run into the settings I apply in the screenshot, simply I alter them as I paint. If you fix Amount of Paint to a low value, it blends the colours together, depending on the management of your strokes and the pressure you put on your pen, and information technology doesn't matter what color you've chosen for your brush. If you lot set up that value to a high number, it'll alloy the colour of your brush with the existing colours. This tool has and so much versatility, and surprisingly the results doesn't even expect like watercolours…
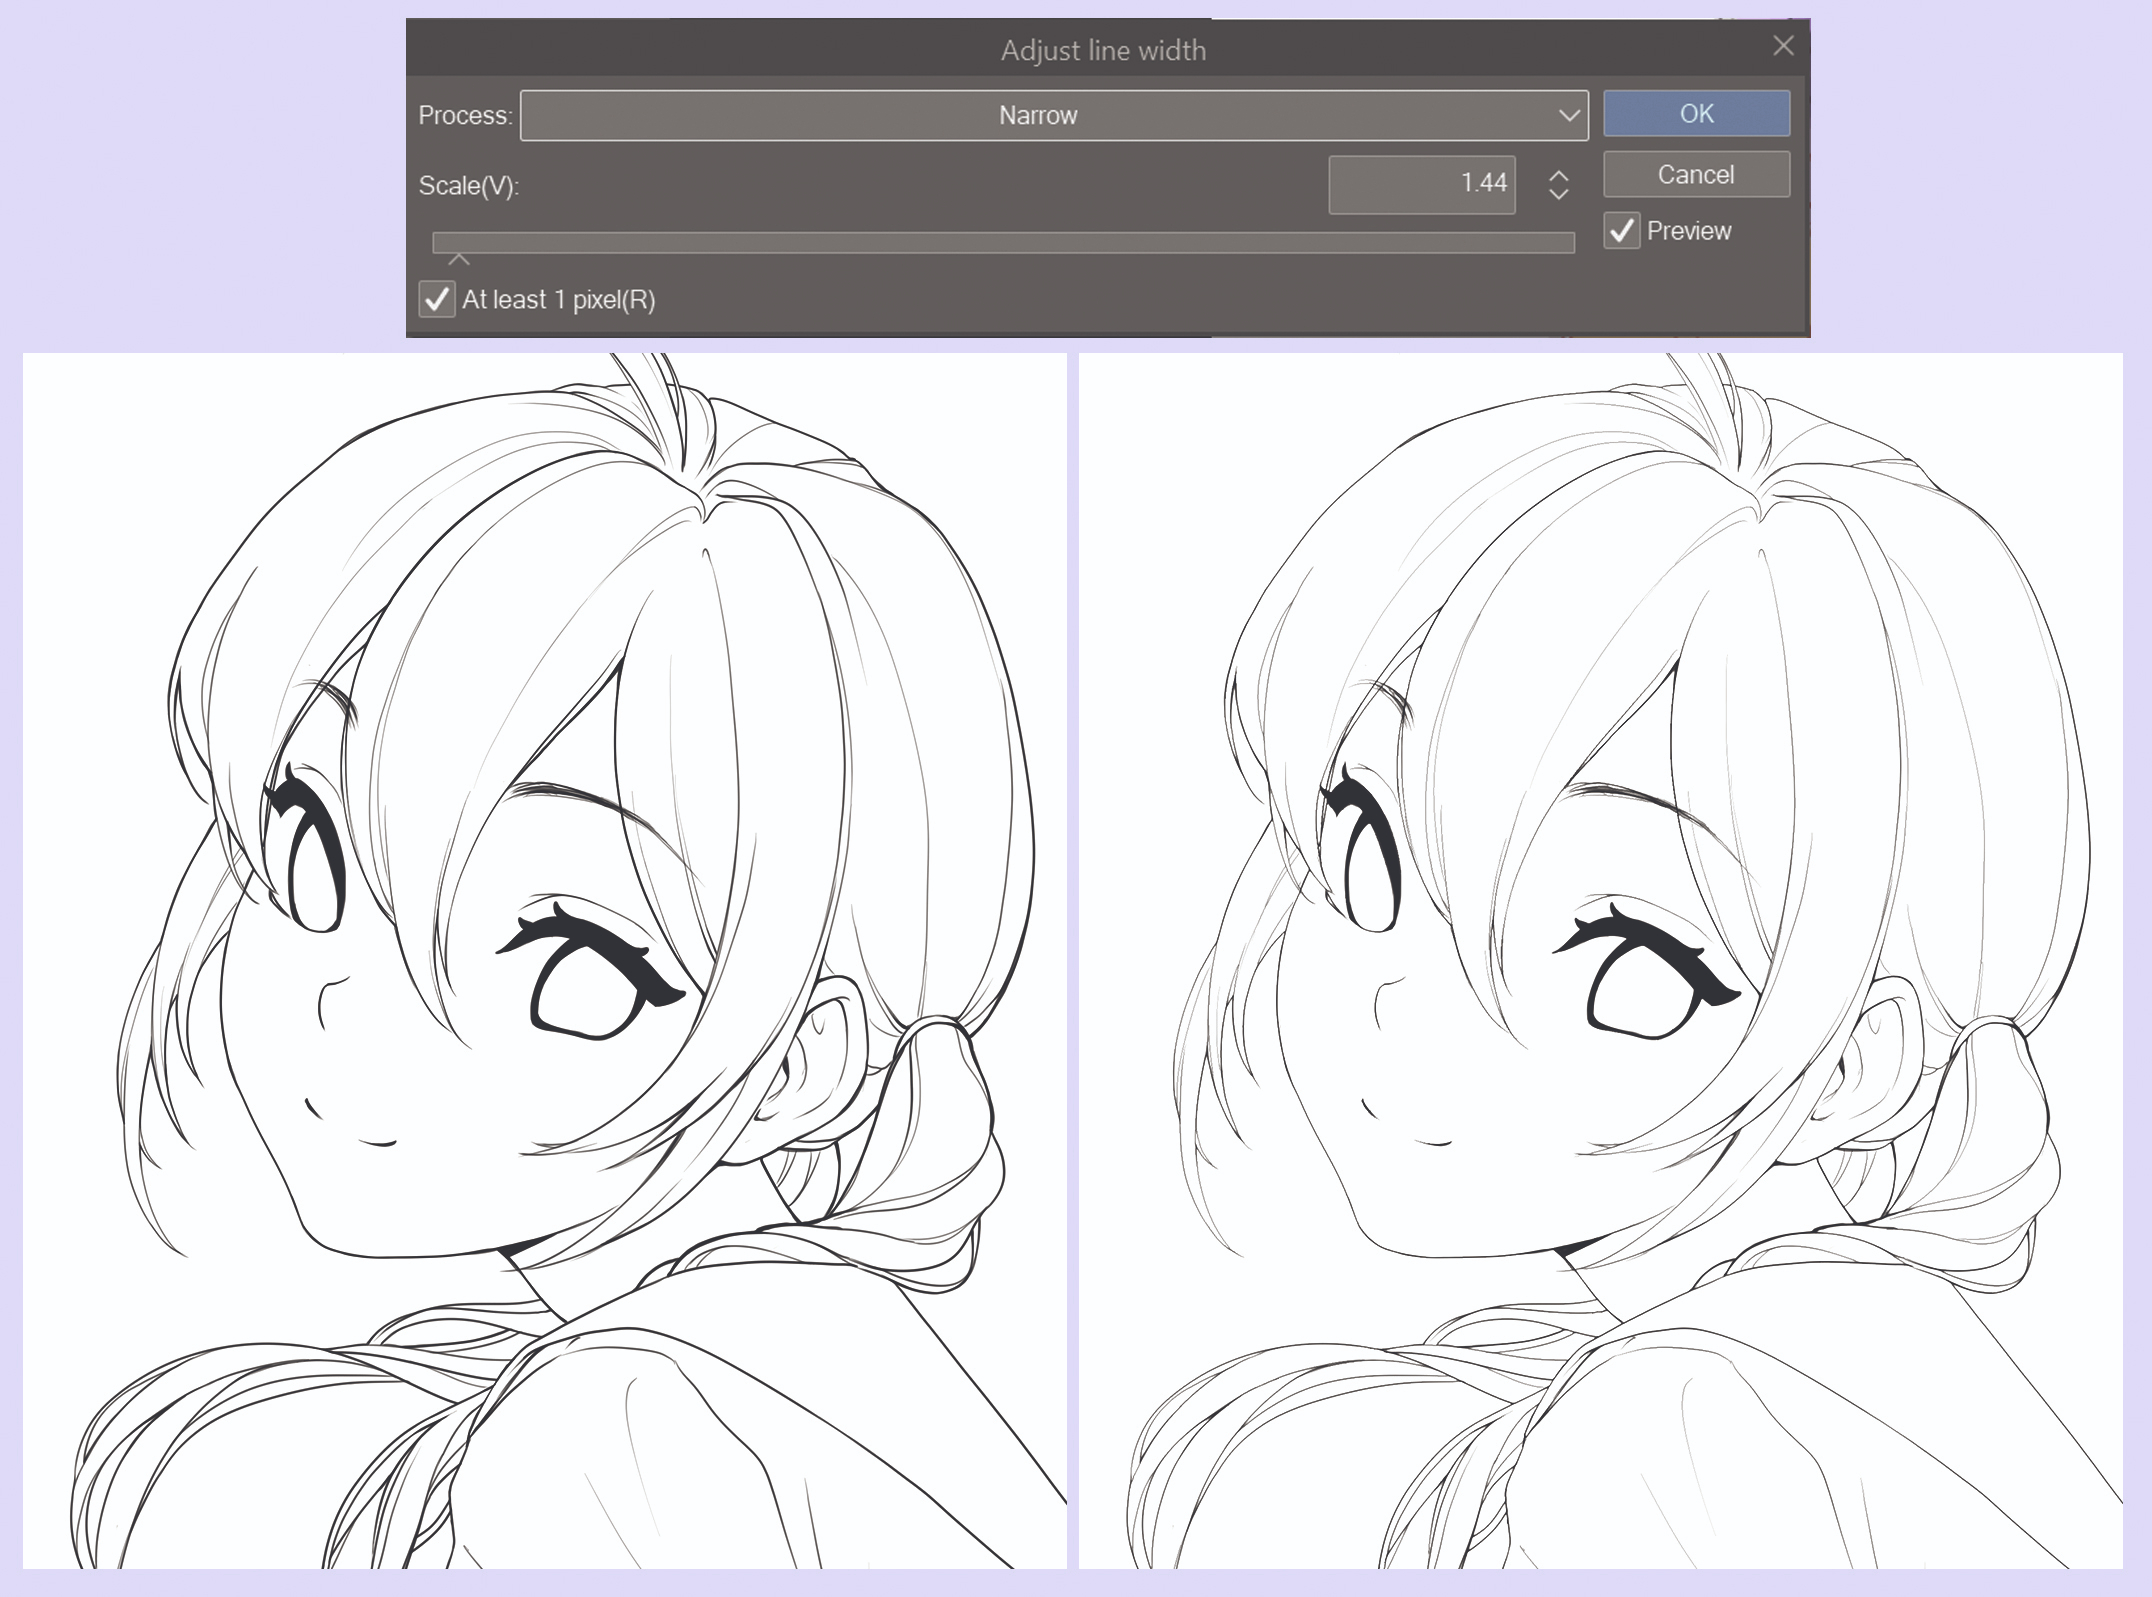
08. Adjust your line widths
(Paradigm: © Asia Ladowska)
Prune Studio Paint is made for painters, illustrators, animators and manga artists, and is packed with functions to help us work faster and more than effectively. One of those functions that I tin't live without is being able to adjust line width. You tin can access it under Filters>Correct line>Adjust line width, and it enables yous to thicken or narrow the line-art. On the left y'all tin can run across the lines I drew originally, and on the right are my corrected lines. Cheers to this function my illustration became fifty-fifty more delicate. However, if your art now looks crude and pixellated, I'd recommend duplicating the layer of edited line-art, blurring it a little with Filter>Blur>Gaussian Blur and setting the layer mode to Multiply.
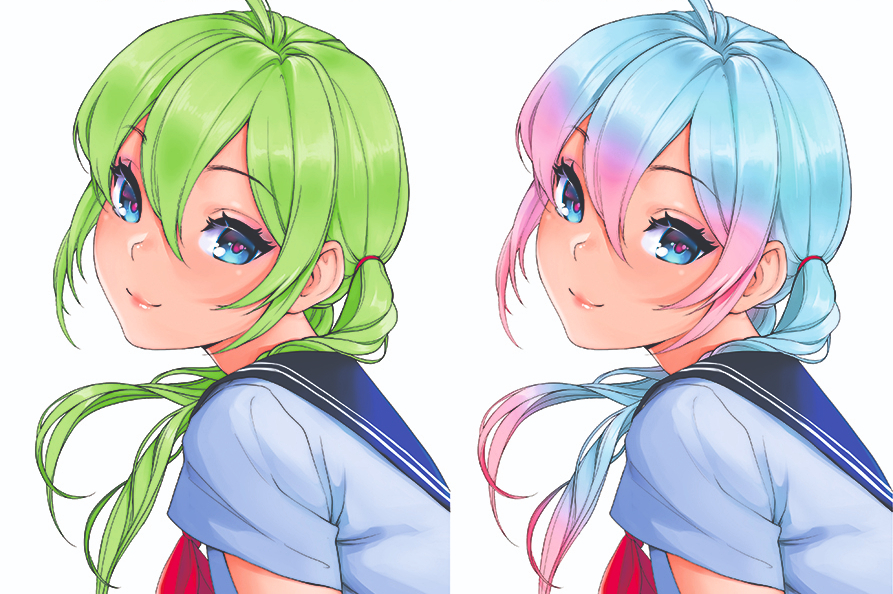
09. Experiment with colours
(Epitome: © Asia Ladowska)
I can never decide what colours to utilize! I dearest playing with colours and changing them to encounter 'what if…'. There are multiple ways you tin do information technology yourself. You lot can either select the coloured area in question (or apply it to a whole layer) and use Edit>Tonal Correction>Hue/Saturation/Brightness filter and adjust the sliders, or clip a layer to the 1 y'all're editing and set it to Color mode, so add colour with the Bucket tool. Y'all can also add together new colours using functions such as Multiply, Color Dodge, Divide… y'all name it! You lot can also mix colours and use gradients, too.
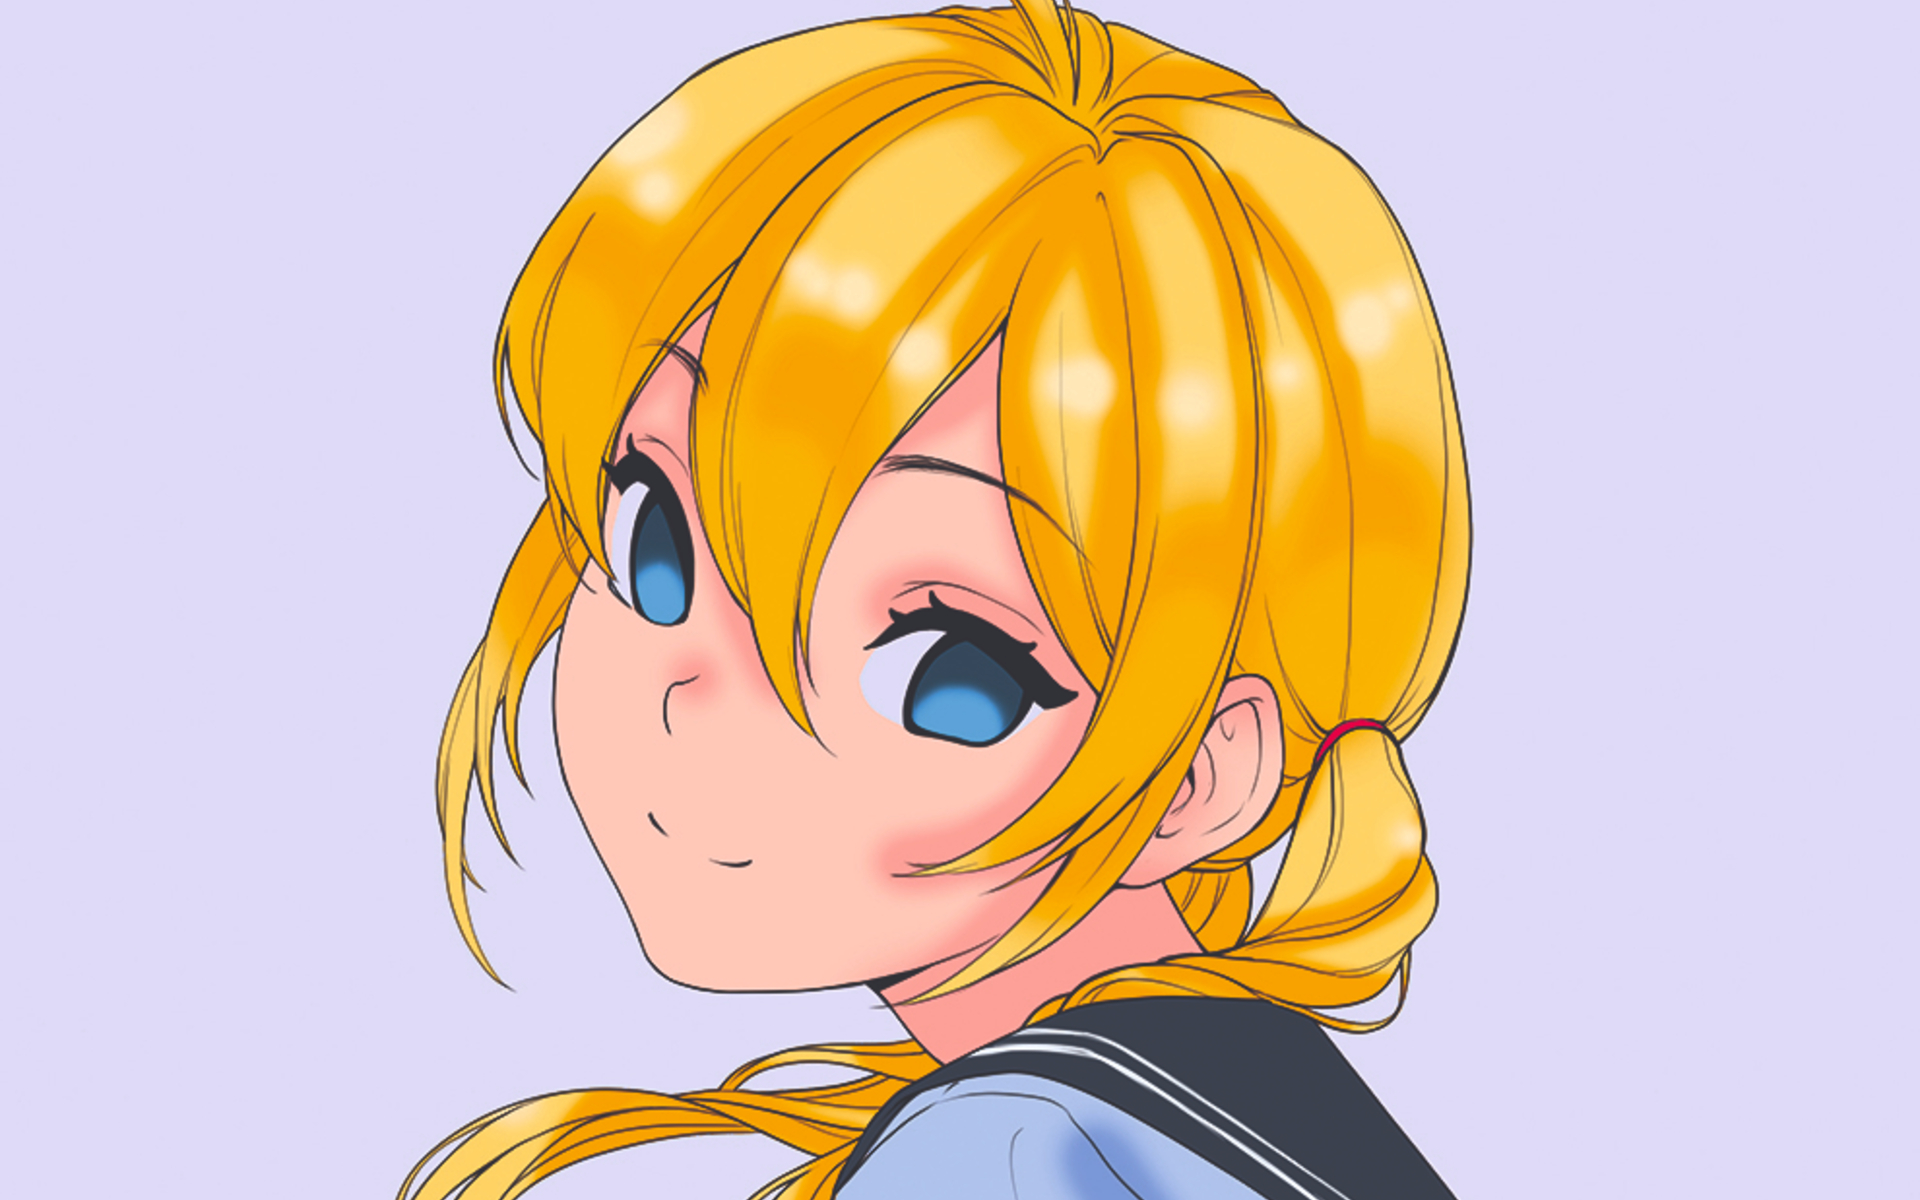
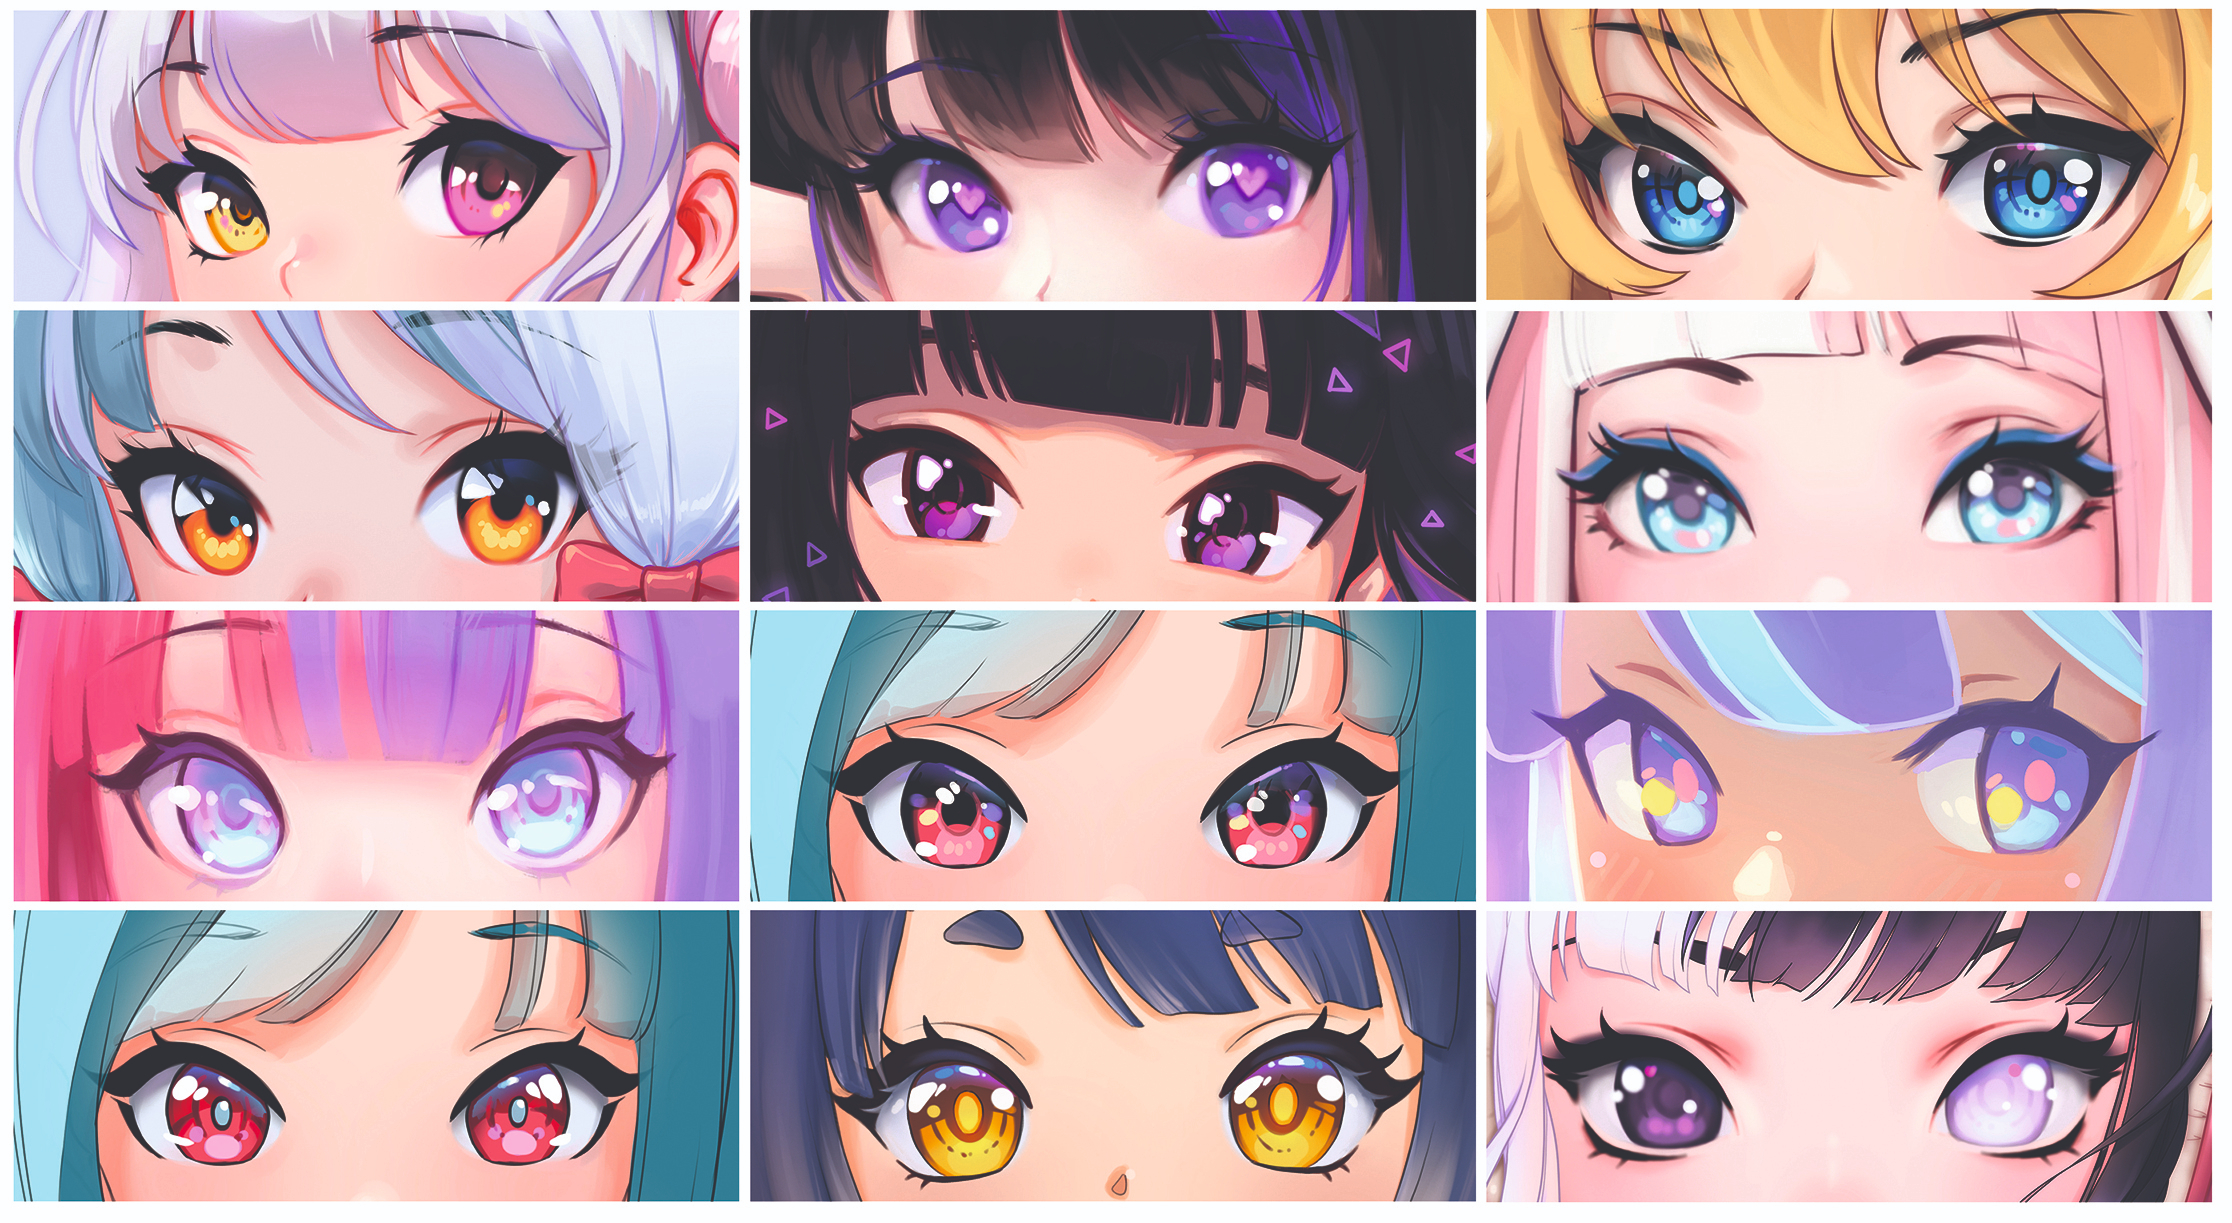
10. Put a whole earth into the optics
(Prototype: © Asia Ladowska)
I do believe that eyes are the window to the soul and I paint them with this in mind. I beloved painting eyes! It might actually exist the eyes that made me autumn in dear with the manga manner art. I endlessly experiment with how I paint them, using a diverseness of styles, shapes and colours. I often have inspiration from other artists besides, and mix their styles with mine. I wonder if you lot tin see my inspirations in my drawings.
11. Define your light source and add together shadows

(Image: © Asia Ladowska)
When creating a base for my shadows I first by calculation basic and delicate shading to my character, without defining any low-cal source. This stage adds depth to flat colours and creates a strong base of operations for the actual shadow.
To paint flat shadows I imagine my light source, then add a layer set to Multiply in a higher place the Color layers. Side by side, I paint a shadow with just i colour on this new layer. It's unremarkably greyish purple, but depending on what event you lot want to achieve, you tin use any color.
I make my shadows glow by calculation another layer higher up my before Multiply one and set it to Color Dodge. Now with a soft brush I pigment the areas that I want to glow, using a color that'southward low on value and high on saturation.
12. Ignore the rules and just paint

(Epitome: © Asia Ladowska)
Everything yous've just read? Sometimes I don't want to practice whatever of information technology! To be honest, it'south a lot to remember and remember about when painting. When I merely desire to relax while creating art I get my illustrations as far as I can with a coloured sketch, and so add a layer on summit of information technology (or sometimes non even that) and only pigment. My favourite tools here are the Darker Pencil and the multifunctional Transparent Watercolor Brush.
xiii. Utilise coloured reflections in your art
(Image: © Asia Ladowska)
Hither'due south a cool technique to bring your illustrations to life: add reflected colours in the shadow areas or on the edges where different colours come across. Colours often reflect each other in nature. If the character is placed in an environment with strong red elements for instance, red is likely to reverberate in some darker colours . The same goes for the blueish of the heaven or green from the grass. In analogy it tin can be exaggerated; manga artists frequently employ pare hue around the face on clothes and pilus to brand the character's peel await soft, almost appearing to glow.
xiv. Don't feel you take to exist amazing at everything
(Image: © Asia Ladowska)
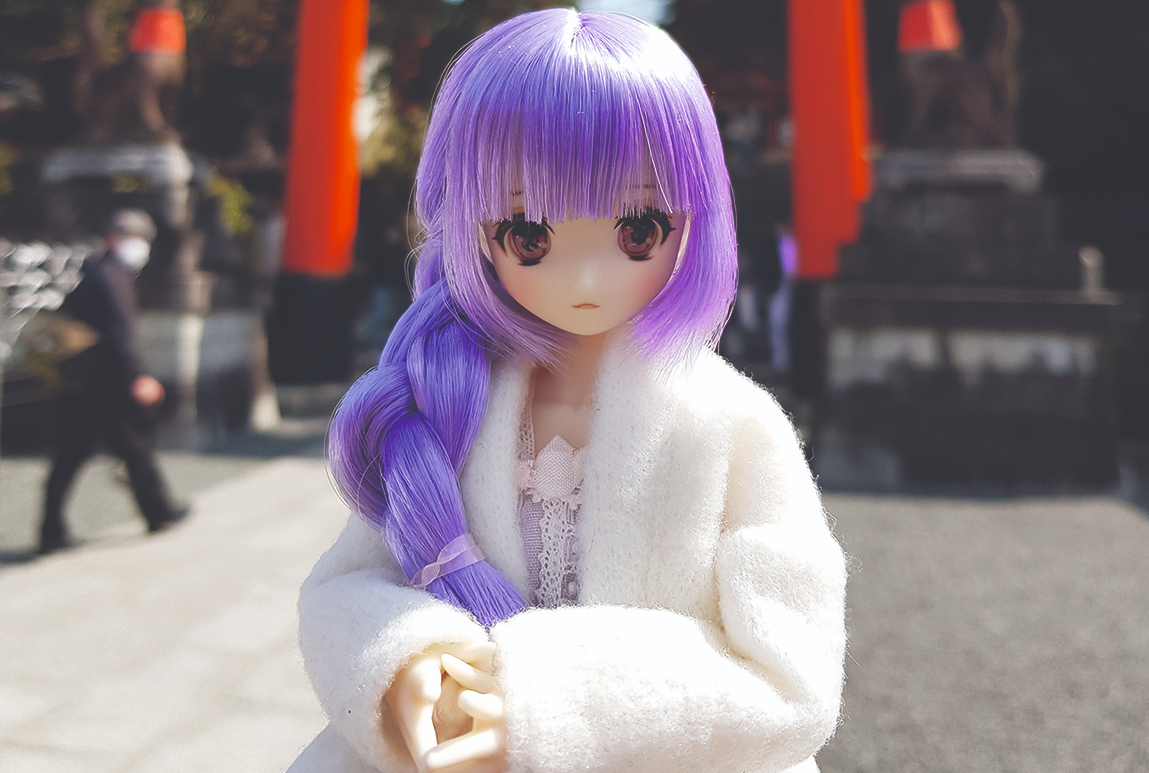
I'k really bad at cartoon backgrounds. I know that I'll get skilful at this when I start practising, simply I haven't found the drive to do so just yet. That doesn't mean I can't create illustrations with backgrounds. I just need to be a little more creative about the fact that I can't paint them! For this illustration I'm using photos I took myself and adjusting them using my photo-editing skills. I crop them, blur, brighten, overpaint and add together effects to the signal where information technology's not easy to tell that these are photos in the background.
15. Know when to walk abroad

(Image: © Asia Ladowska)
Often I'll blast through the entire illustration process, and so sit in front of the canvas adding and deleting layers for hours, only to end up exactly where I started. Am I finished? Should I add together more? Does information technology look practiced? Tin can it wait better?
What helps me to walk away from the drawing (when I'1000 unable to grasp that I don't demand to create a masterpiece every fourth dimension I describe) is my list of things I can do to help shut the affiliate. These steps are: adding a little more Color or Glow Contrivance (like the bokeh lights you tin can come across in the picture show; calculation a Color Balance Layer; and adding a signature. And unless I upload the cartoon online it's likely that I'll come back to it and waste more than fourth dimension. Posting online gives me closure. My social media platforms are a journal of my artistic journeying. A trip full of learning, discovering, creating and of course, mistakes as well.
This article originally appeared in ImagineFX , the earth's best-selling magazine for digital artists. Subscribe here .
Want some new software? See the deals we've establish below.
Related articles:
- Tips for drawing manga faces
- Manga artists to pay attending to
- Illustration vs photography: how practise yous make up one's mind?
Related articles

Source: https://www.creativebloq.com/how-to/draw-manga
Posted by: mcnabbshor1952.blogspot.com
0 Response to "How To Make Your Manga Drawings Look 3d"
Post a Comment